Showing posts with label quick. Show all posts

November 25, 2013

Radicchio: Garden Series Part X

This will likely wrap up my 2013 garden series, which I'm happy to report was ten posts in total.


I finally made it out to the garden to clean it up a couple weeks ago, before the real winter weather rolled in. Under the mass of dried and dead tomato vines and the pole bean hedge, I found that I still had plenty of Swiss chard, sage, parsley, and thyme (no rosemary).  And radicchio!  What a beauty!


In standard store-bought salad mixes, I am not a huge fan of the thick, bitter leaves.  And although Italian eat radicchio regularly (hence its Italian name- and those are hard Cs there), I totally grew this one for its looks and it didn't disappoint.  It starts out as a hardy green that forms a head.  At one point, I tried sautéing these green leaves with salt and olive oil, but the dish was too bitter to eat - so much so, I started to wonder if the plant is actually poisonous at this stage.


Then I left the plants to themselves and they started turning their famous deep purple at the veins and edges. Quite beautiful, really.  I decided that once they turned full purple, I would try grilling or braising them... something to get some char on the cut side and to be served with vinaigrette.  It worked.


SIMPLE RADICCHIO, BROWNED AND DRESSED
  • 1 small head radicchio (or endive or romaine hearts)
  • Olive oil
  • Salt and pepper, to taste
  • 1/4 cup olive oil
  • 1/4 cup balsamic or apple cider vinegar
  • 1/2 t. dijon mustard
  • More salt and pepper, to taste
  • Parmesan cheese, to garnish (optional)
  • Polenta-No Burns, No Mess (optional serving suggestion)

Peel outer leaves off of the radicchio until you reach the clean, tight inner leaves.  Trim stem end and slice lengthwise in half.

Heat about a tablespoon of olive oil in a skillet (this skillet should have a lid that fits it for later) over medium-high heat.  Once hot, place the radicchio in the skillet, cut sides down.  Allow to sizzle for a minute, reduce heat to medium-low and cover.  Allow to cook for about 2-3 minutes and turn off heat. The radicchio will release a lot of moisture, so to avoid oil splatter, you can leave the skillet covered until sizzling subsides.

Meanwhile, put 1/4 cup olive oil and vinegar into a Mason jar or similar container. Add mustard, a pinch of salt, and a few grinds of black pepper.  Seal jar and shake well.

Remove the radicchio from skillet using tongs and place on top of polenta (or by itself on a plate). Season with salt and pepper, drizzle with vinaigrette (you'll have plenty leftover for future salads), and top with parmesan. The radicchio will still be slightly bitter, but should be balanced with the vinaigrette and have some nice, crispy edges from the browning.  Enjoy!


November 11, 2013

That's Entertainment! Or, Garden Series, Part IX: Corn

The past week was full of entertainment!


I went to a play reading, started one of those free trial months on Netflix (turns out it still isn't for me), went to see Thor: The Dark World, and watched the Broncos defeat the Chargers.  I had popcorn more than once and decided that you all might like to see about growing and making your own popcorn.  It's fun!


I decided that growing regular corn does not really work in my garden.  It takes up too much space to get a reasonable amount and there is about a one-day window to harvest and eat it in the proper stage, if you choose to grow an heirloom variety, which I do.  Popcorn varieties, on the other hand, tend to be a little smaller and you just leave them out there until the stalks start to dry out.  And say a little prayer that the squirrels don't figure out how to peel back the husks (hint: don't help them by checking the ears of corn).


I grow a variety called "Strawberry Popcorn" - named for its brilliant red kernel color.  It's an heirloom variety and the seeds save very well.  It grows to about four feet and each stalk produces two small ears and the kernels pop up small and bright white.  This year, I gave regular eating corn another chance, but had I given over the space I had for corn to just popcorn, I think I would have had a decent stock for winter.  The eating corn I grew is "Rainbow Inca" (shown below) and is quite pretty.  It has an honest corn flavor, but goes to starch about two days before I try it every year ("dent" stage, as can be seen by the dents in the tops of the kernels).  Very gummy.


Popcorn is such an entertainment food!  It can serve the needs of a variety of dietary restrictions and almost everyone loves it.  Today is not so much a recipe - it's pretty basic, but a reminder to give it a try and dream up possibilities with it.  I like the standard buttered and salted popcorn, but also love adding jalapeño powder, chocolate drizzle, or dried fruit.  I have a friend who adds a milder chili powder and truffle oil to great results. Pets also like popcorn, which to their delight inevitably gets dropped on the floor during snacking.


POPCORN
  • 3 parts popcorn kernels
  • 1 part oil or fat of choice - plain vegetable, olive oil, or combination with flavored oils
  • Salt to taste
  • Extras! (see suggestions below)
Place oil and kernels in a popcorn maker (I have a super-seventies one with a butter drip container built into the lid), plug in, and allow to pop.  Unplug the maker when the popping subsides.  I have never actually made popcorn on the stovetop, but I found great instructions here.


EXTRAS
  • melted butter and salt
  • jalapeño powder, chili powder, chili spice blends
  • melted chocolate, drizzled over top and allowed to harden
  • nuts and dried fruit
  • mini pretzels and peanuts
  • paprika and minced fresh herbs
  • cumin and/or garam masala
  • grated parmesan or other hard cheese
  • toasted sesame seeds and/or nori strips
  • za'atar
  • caramel corn (I have not attempted this yet, but I do love it)
  • mix into homemade granola-nut bars (an idea I have for an upcoming post)

Any special additions that you like?  Please, please, please, put them in the comments - I love collecting new ideas!  Now go make popcorn and be entertained!

September 16, 2013

Soup and Bread for a Rainy Day

As I'm watching the Seattle v. San Francisco game after a long weather delay, we in Colorado are experiencing our fifth or sixth day in a row of rain.  Seattle and the rest of the non-Mountain States might wonder at our insane flooding and general inability to deal with a few days of rain.  But we normally live in a constant state of drought and have received an entire year's worth of rain in the past few days. I've heard that if this was winter, Boulder and some areas of Denver would be buried under ten to twelve feet of snow.


In case you don't actually know me or live in Colorado, I am safe and dry inside my undamaged home. However, my friends a few blocks away had to bail our their basement and pretty much everyone I know in Boulder has been getting around in waders and canoes.  Also, if you don't live in an area with forest fires, you may not realize that burn scars make flash flooding that much more intense and dangerous. It's bad combination and it's a really, really bad situation.


Food-wise, it's the first time in months that my apartment has been in the seventies and will serve as an opportunity for reacclimatizing before the first frost.  In other words, it's pleasant to be in a warm kitchen and soup is on the menu.  Plus, it's football Sunday as I'm writing and cooking, so I thought an American classic - Broccoli Cheese Soup - sounded especially good.  It was.

A couple of notes about the soup I made:

- Turmeric is completely optional.  I have some in the crisper and I like the trompe-l'œil of the yellow hue without having used yellow cheese.  If you're cheese is yellow, that's fine, too.

- I actually did not eat bread with my soup, despite the title of the post. I had some to eat with the soup, but it tasted off.  I replaced it with rye crackers, which I'm really getting into these days.

- After I finished making the soup, I remembered that I have a really good ale in the fridge and I should have used it as an ingredient.  If that sounds good to you, increase the milk to 2 1/2 cups and replace the water with a bottle of medium-dark beer.  I know much more about wine than beer, but I suggest a red or brown ale.

- For my extra-pungent cheese, I used Beehive's Barely Buzzed cheese.  It is a sharp cow's milk cheese with a coffee-lavender rub.  It is very good.  I decided to use the last couple ounces I had for the soup because I have already had a homemade cheese plate and wine for dinner one and a half times in the past three days.

- Please don't leave giant chunks of things in your soups (maybe unless it's ramen or pho).  It's just not nice to have to cut up things in a bowl of soup.  Or bite into chunks of things while they are dripping broth, which is rather unbecoming.


BROCCOLI CHEESE SOUP
  • Large head of broccoli
  • 2 T. butter
  • 1/2 onion, diced
  • 1/2 inch piece of turmeric, grated
  • 2 T. flour
  • 2 cups whole milk
  • 2 cups water or broth
  • 2 oz. extra-sharp, hard cheese of choice (see note), grated
  • 6 oz. sharp, melty cheese of choice (like cheddar or Monterey jack), grated
  • Salt, to taste
  • Black pepper, to taste
  • Good bread or rye crackers

Carefully chop broccoli into a mix of small dice and bite-sized pieces (see note).

In a large saucepan, melt butter over medium heat.  Once hot, add onion and grate in turmeric with a microplane. Stir occasionally until onion is soft.  Stir in broccoli and let sit for a couple of minutes, to encourage a little browning.  Stir a few times, cooking until just soft.  Add in olive oil.

Sprinkle flour over vegetables and stir until absorbed.  It's okay if it starts to stick to the bottom of the pan and brown.  That's flavor.  While stirring, add in milk bit by bit.  Once fully incorporate, add water or beer.  Once the soup just reaches a boil, add cheese and stir until fully melted and incorporated.  Heat until just reaching a boil and turn off heat.

Because the cheeses and broth can really vary in saltiness, season with anywhere from a half teaspoon to two teaspoons salt.  Grind in lots of black pepper.

Serve with bread or crackers to dip into the soup.  Feel cozy.

Serves 4 to 6.


September 9, 2013

Garden Series, Part VIII: Carrots and Cucumbers

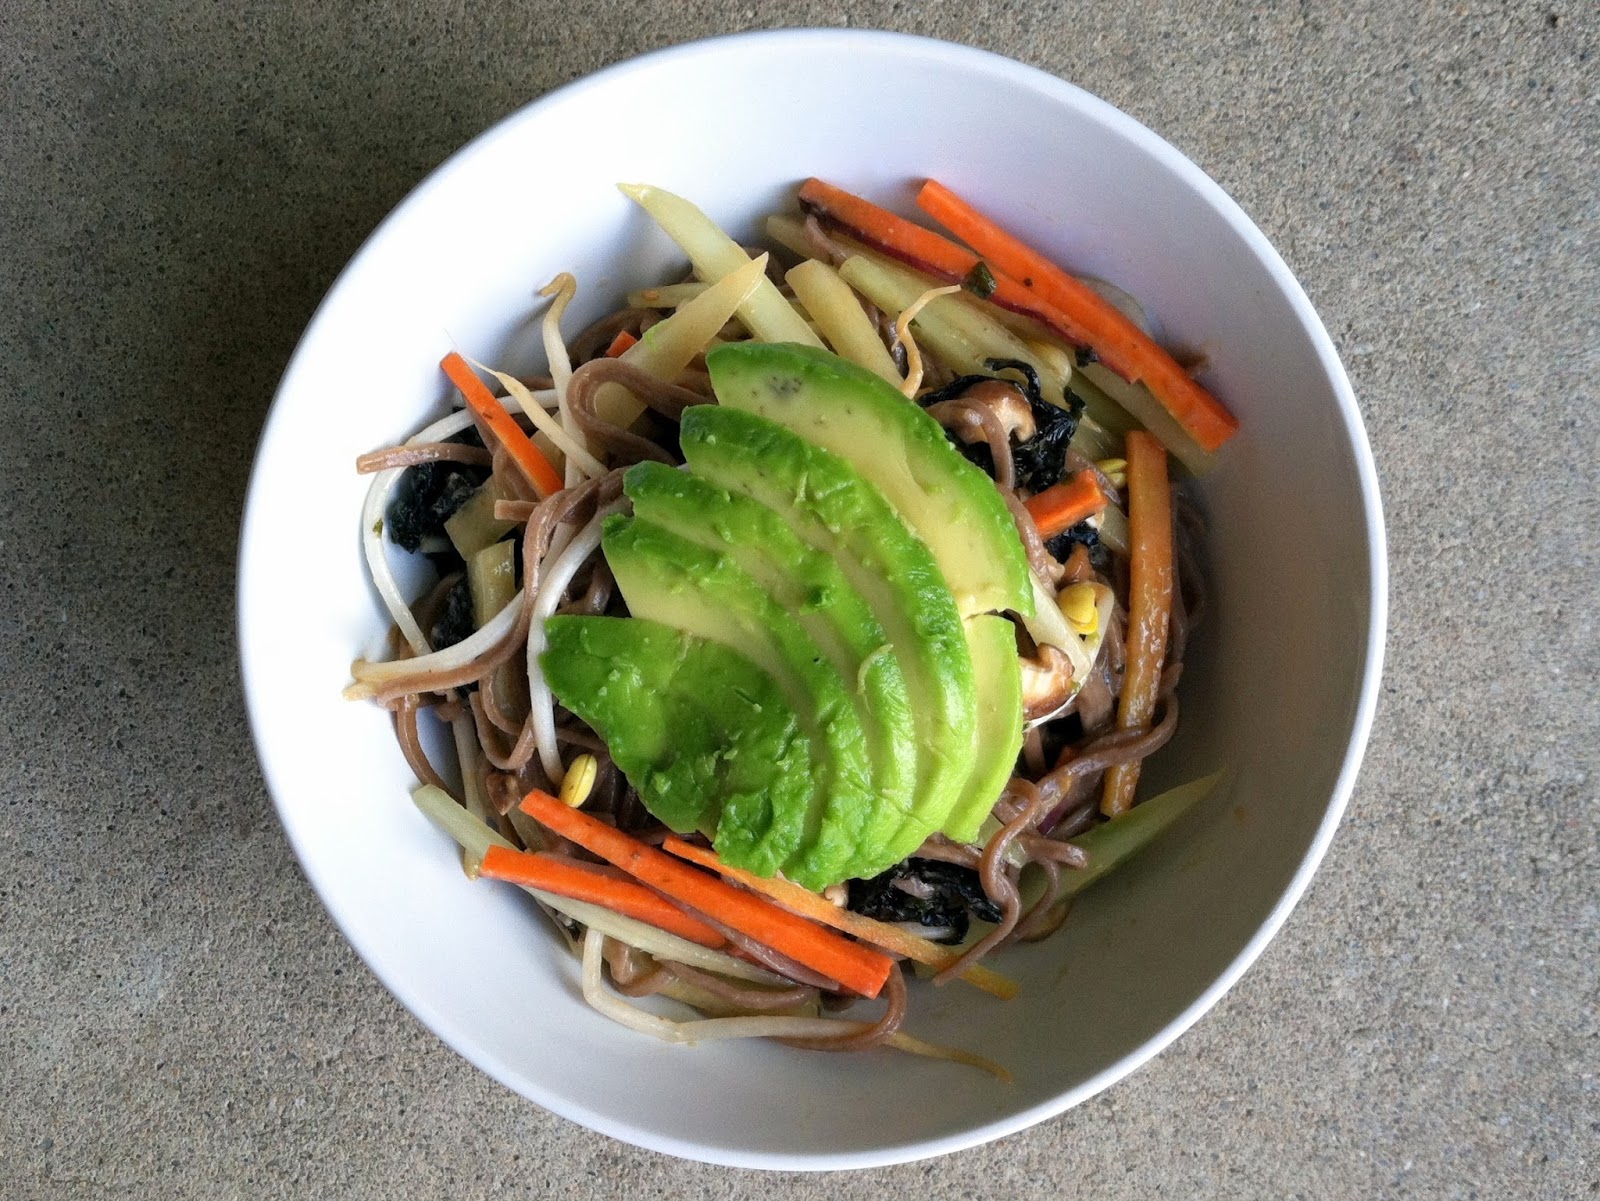
Recently, I was in the middle of a baking project and realized I had missed lunch.  Also recently, I went on an excursion to H-Mart in the suburbs with a dear friend of mine and loaded up on ingredients not found in the local grocery.  Such a good match, these two occurrences.  Throw in some garden produce, and you've got a late lunch. Or dinner, I'm not picky.


But not to worry, I'm not giving you a recipe with a bunch of hard-to-find ingredients.  In fact, it relies on the American standard of the sweetest, most-hydrogenated peanut butter, which I love despite all its failures.  Of course, you are welcome to use the natural stuff, if you have that sort of thing lying around.

Besides the Jiffy, the most exotic ingredients are soba noodles, Sriracha, and shiitake mushrooms - all of which one can find in the regular grocery store, but probably for twice the cost.  I'm not sure about the Sriracha, though, since I bought a huge bottle of it the last time I went to H-Mart and have never looked back.  It's basically an essential pantry ingredient.


In the pictures, you'll see a pile of fried seaweed with sesame seeds.  This stuff is seriously delicious, but probably far less likely to be found anywhere but the giant Asian grocery in the suburbs.  It turns out that it's best eaten as a snack on the side anyway.  I have no idea what's in it it either, but I'm pretty sure that it's manufactured to have an addictive balance of salt, sugar, and fat that makes it so you can't stop eating it.  You'll never know whether I'm snacking on it right now while I'm writing this.


As for the carrots and cucumbers, I highly recommend getting your hands on homegrown.  I know this isn't necessarily that easy, but homegrown carrots are the best.  They taste really, really good and if you eat conventional baby carrots from the supermarket, you will be really surprised at the carrot-y taste of back yard carrots.  I grow a variety of them because I am still fascinated by purple (Cosmic) and red (Atomic) carrots after my fifth garden.  I grow a few different cucumbers, but my long-standing favorite is Suyo Long.  It's a strange-looking variety that stays crisp, has few seeds, and refreshing cucumber flavor.


SOBA NOODLES WITH VEGETABLES

  • 1 bundle (serving) soba noodles
  • 2-4 shiitake mushrooms, sliced
  • 1/2 cucumber, seeded and cut into matchsticks
  • 1 carrot, cut into matchsticks
  • large handful mung bean sprouts, picked over and rinsed
  • radishes, or any other vegetable that sounds good (optional), cut into matchsticks/julienned
  • 1/4 avocado, sliced
  • olive oil
  • pinch salt
  • 2 t. peanut butter
  • 2 t. soy sauce
  • Sriracha, to taste

Cook soba noodles according to package directions.  Rinse well under cold, running water and allow to drain.

Heat a scant tablespoon olive oil in skillet over medium heat.  Add shiitakes and stir to coat with oil. Stir in salt and sauté until thoroughly cooked.  Set aside to cool.

In a small bowl, combine peanut butter, soy sauce, and Sriracha.  In individual serving bowl, toss together noodles, shiitakes, cucumbers, carrots, sprouts, and sauce.  Top with avocado.  Feel free to add more soy sauce and/or Sriracha to season to taste.

Serves one. 


*Later in the week I made a crazy delicious Bacon Pad Thai.  I took no pictures of it, but perhaps round two will surface in a week or two.

August 26, 2013

Garden Series Part VII: Tomatillos

Okay, it's more like Part VI-b because I just wrote about the nightshade family a couple of weeks ago...


...but my nightshade recipe did not include tomatillos and I have now written over fifty (!) little articles for you all, so I have license to be a little cavalier.

I spent a little hangout time in the garden the other morning realizing how terribly overgrown the whole thing is and then lost track of time pulling up over-prolific strawberry plants, rearranging cucumber vines, and staking quinoa stalks.  I also disentangled the many, many branches of tomatillos that were starting to climb through the privacy fence to my neighbor's yard.  Guessing by the way she ripped the pole beans apart that reached her side, I don't think she would appreciate the tomatillos.


I'm actually really happy with the shear abundance of fruit on the tomatillo plants this year.  Last year I grew one very large plant that had hundreds of sweet yellow flowers, but never produced a single fruit.  While I hadn't read anything on the subject, I know that sometimes growing more than one plant of a single variety is necessary and I gave that theory a shot this year.  It worked.

The tomatillos you see here are the Purple de Milpa variety and are quite a bit smaller than the standard ones you find in the grocery store.  As they get more direct sunlight, they get more purple (purpler?).  The purple stripes and shoulders you see on the fruits themselves are where the husks either split or grew transparent as they dried.


So what to actually do with tomatillos?  I only know one recipe that uses them, which is an especially delicious salsa I learned to make from my friend Hector's mother, Angelica.  She's from Mexico (they both are) and the salsa is likely traditional to Michoacán, but I got the impression that she is inventive in her own right.  She makes a smoky chile oil that I would buy by the case.

DISCLAIMER: I checked to make sure the recipe isn't a family secret and now I get to share it with you here.  If you like it, Angelica gets all the credit.  If you don't, I probably forgot something and it's totally my fault.  Or you simply have bad taste, you poor thing.


This is an avocado salsa, but is completely different than guacamole.  It's wonderful on just about anything, especially fish tacos.  I didn't have the fixin's for fish tacos today (plus, I'm still working on the food-sensitivity thing from last week), so I put it on the chicken I made for dinner.  I'm not a huge fan of chicken, so this was a good move.


SALSA DE AGUACATE
  • 1 pint tomatillos
  • 1-2 jalapeños, depending on how spicy you like
  • 1 avocado
  • salt to taste

Peel the husks off the tomatillos and rinse thoroughly to remove the sticky film.  Wash the jalapeños and trim the stem from the end.  Put the tomatillos and jalapeños in a medium saucepan, add water just to cover, and set over medium heat.  Bring to a boil and simmer until the tomatillos are softened, about five minutes.

Using the saucepan lid to hold the tomatillo mixture back, drain off the excess water.  Put the mixture into a blender.  If you are using a standard blender, remember to remove the center of the lid and cover with a washcloth and your hand to avoid a hot-blended-mess from erupting onto your ceiling and into your eyes.  Blend until smooth.  I sort of have a feeling that Angelica strains the seeds from the mixture at this point, but I'm a little lazy and don't mind the seeds.

Add the avocado and salt and blend until smooth.  The consistency should be just pourable, so add water as necessary to thin.  Taste for salt before pouring the salsa into a bowl.  My favorite way to taste-test a salsa is to use a tortilla chip.  And to do several tests.

Allow to cool and chill until ready to use.  Seriously, put it on anything you can think of.


Look at that well-balanced meal!!!

Note:  Uhh...I'm aware that I posted two salsa recipes in a row.  I'm letting the 50+ posts thing go to my head and I'm fine with that.  And also, my dear friend is hosting a Labor Day Salsa Challenge and it's been on my mind.  And it's summer, for crying out loud.  But I promise something more substantial next week.

August 12, 2013

Garden Series, Part VI: Solanaceae, or The Nightshades

Tomatoes! Tomatillos! Chiles! Eggplant! Potatoes! And basically everything good!

My favorites of the garden are starting to come into season.  There is a strong tomato focus to my garden and I have recently discovered that eggplants are quite beautiful. If you know me, you may know that I'm not a fan of bell peppers (blech!), but I do love the spicy kind, and chiles also make for pretty plants.  This year, I gave Purple de Milpa tomatillos another chance, and while they are not ready yet, there may be hundreds in a week or two.


It turns out that the members of the Night Shade family make great cooking companions.  Most of my gardening and cooking energy goes to the tomatoes, as I can them and freeze them and use them throughout the year.  As if I'm a pioneer.  Or a survivalist.  (I'm neither, but that's beside the point.)  But other than a potential jar of pickled jalapeños, the non-tomato night shades get consumed right away.  We'll see about using up those tomatillos...


It also turns out that mixing together tomatoes, eggplant, and chiles makes for a great puttanesca sauce.  Well, at least with the addition of some pantry ingredients, like capers and pickled peperoncini (American-style, not the strict Italian translation). Olives would be great, too, but I'm out. It's also entertaining to me that "night shades" make up the sauce that was for "ladies of the night." But I love a little wordplay and I'm aware that I'm kinda nerdy and cerebral. 


I was a little worried about posting too many pasta recipes, and then realized that pasta can almost always be replaced by pouring the sauce over polenta.  I thought of this as I was eating and found myself wishing I had done this in the first place.  So, if you're not into pasta, think about polenta.


PUTTANESCA
  • olive oil
  • 2 cloves garlic, crushed
  • 1 hot chile, sliced
  • 1 small eggplant, chopped
  • 4-5 medium tomatoes, chopped
  • 2 T. capers
  • 2-3 peperoncini, sliced (American-style)
  • salt and black pepper
  • handful of basil
  • parmesan, to garnish
  • chèvre, to top
  • 1/2 pound penne OR POLENTA

Start water for the pasta, or prepare polenta.  While heating and cooking, prepare the sauce.

In a medium cold skillet, pour in 1-2 tablespoons of olive oil.  Add garlic and set heat to medium.  Once the garlic begins to sizzle, stir a few times and allow to cook for about 30 seconds, depending on the heat of the stove. Add chile slices, give a couple stirs, and then add the eggplant.  After about a minute, add the tomatoes, capers, and peperoncini.  Allow the ingredients to cook and release their juices.  After about five to ten minutes, they will come together as a nicely textured sauce.  Season with salt and pepper.

If using pasta, reserve a little pasta cooking water, drain, and toss directly into the sauce.  Loosen with pasta water as necessary.  Chop basil at the last minute and toss along with the pasta and sauce. Serve topped with parmesan and some good, solid chunks of goat cheese.

If using polenta, ladle the polenta into bowls.  Toss freshly-chopped basil into the sauce and pour over the polenta.  Garnish with parmesan and goat cheese.  Enjoy outside on the patio overlooking the garden.  Perfect.


July 22, 2013

Garden Series Part V: Green Beans & Chiles

This week the garden has been neglected.  It was not intentional, but for once I was busy doing more traditional thirty-somethings' pass times.  If you live in the Denver area, you may be aware of the UMS (Underground Music Showcase) and that it can take up a lot of your time.


It was fun and I saw some long-overdue shows.  I saw many friends and had many drinks.  I happened upon Residual Kid, and holy shit, they were awesome.  But if I'm being honest, I normally tend towards the nerdier of hobbies.  Like this poor garden, overgrown with runner beans and turnips and dill.  And wilting in the July sun.

Most of the time, friends are surprised about the gardening habit.  I'm not sure they are more surprised that I actually have a back yard in the city or that I would willingly do all the work.   I usually meet the astonishment with confusion, because I see it as more than rewarding for not much work at all. Sure, digging up 300 square feet of compacted soil by hand is serious labor, but I only had to do that once four years ago and there is machinery available for that sort of thing.  And I don't mind working when I'm properly compensated.


If you really want to know about why I do it, it's not just about the produce or eating off the land.  It's not about making any and all guests take my garden tour (which is pretty high on the things-I-love-about-gardening list). Although I am concerned about the food industry and I like to know where my food comes from, I'm not even trying to reach some high level of local eating.  It's mostly because I find the entire process endlessly fascinating. Every summer I am shocked to see what I get from a handful of seeds in March.  I am enamored with the hundreds of heirloom and unusual varieties that you just never see at the grocery store.  I consider getting some sort of advanced degree in botany.

Plus, I'm growing quinoa this year.  Quinoa, guys!

As for my other nerdy interests, like cooking and sewing and learning about things...uh, I'm not much of a camper or an athlete. Ahem, but when the world ends and we sink into survivalist indecency, I will have clothing and food and a warm quilt and I will know stuff.*  And I share.

Oh.  How about a recipe?


BLISTERED & SPICY GREEN BEANS

  • Large handful green beans, trimmed
  • Splash olive oil
  • 1 hot chile, sliced thinly
  • Salt to taste
  • Sesame oil

Set a medium pot of salted water to boil and meanwhile prepare the rest of the ingredients.  Once at a boil, blanch green beans for about 2-3 minutes.  Strain through a colander and rinse with cold water to stop the cooking.  Drain well and blot them with a towel to dry before adding them to hot oil.  Ouch.

Put olive oil in a medium sauté pan and heat to medium-high.  Toss in chile and allow to sizzle.  Once hot, add the blanched green beans and toss to coat.  Stirring or flipping the pan only a few times, allow the beans to cook until blistered on all sides.  Season with salt and plate them up.

Drizzle a very small amount of sesame oil over the top.  Pretty delicious.


*I'm feeling a little ornery this time.

**The purple beans in the first picture are Trionfo Violettos.  They turn dark green when cooked.  The purple chile is a 5-Color Chinese Chile.  These make for such beautiful plants - the chiles start purple, then turn white, yellow, orange, and red.  The purple stage is quite spicy enough.

July 8, 2013

A Quick Homemade Ice Cream

Did you know that you can basically combine cream and jam, freeze it, and you have a great homemade ice cream?


Okay, so I would recommend an actual ice cream maker, too, and a little alcohol (for texture!).  But that's it!  No egg custard or standing over the stove in a cloud of steam for twenty minutes in the dead of summer.


I found this novel idea within the pages of Bruce Weinstein's The Ultimate Ice Cream Book, which is as the name promises.  All of the basics are there, but so are unusual flavor combinations and many ideas to build on.  I am also lucky enough to have received several jars of the best-ever homemade apricot jam from my Aunt Lynne (the very same Aunt Lynne responsible for the gingersnaps at Thanksgiving time), and one recent evening I thought a bowl of apricot ice cream would be nice.


Lo and behold, there the recipe was...just sitting there between Maple Ice Cream and Mint.  Twenty minutes later, I had my bowlful of apricot ice cream.  Sans stove.  As soon as my ice cream canister was frozen again, I made some blueberry.


QUICK JAM ICE CREAM
  • 1/2 pint jam of your choosing (or marmalade)
  • 2 T. liquor of choice, like whiskey for nuance or vodka for clean flavor
  • 1 pint half and half

Stir together all ingredients in a medium bowl (or large pitcher for easy pouring).  I used a whisk to break up the jam, but left fruit pieces whole for texture.

Pour into ice cream maker and freeze accordingly.  Scoop ice cream into storage container and put into the actual freezer.  No need to wait for anything, though, serve yourself a generous scoop while making the transfer.

The ice cream will be a little soft at first, but also will not harden completely after an overnight freeze, due to the alcohol.  This means you can have it for breakfast without having to wait for it to thaw first.  See?  I take care of you.


May 20, 2013

First, Salad

The garden has shown a rather remarkable renewal in the past week.


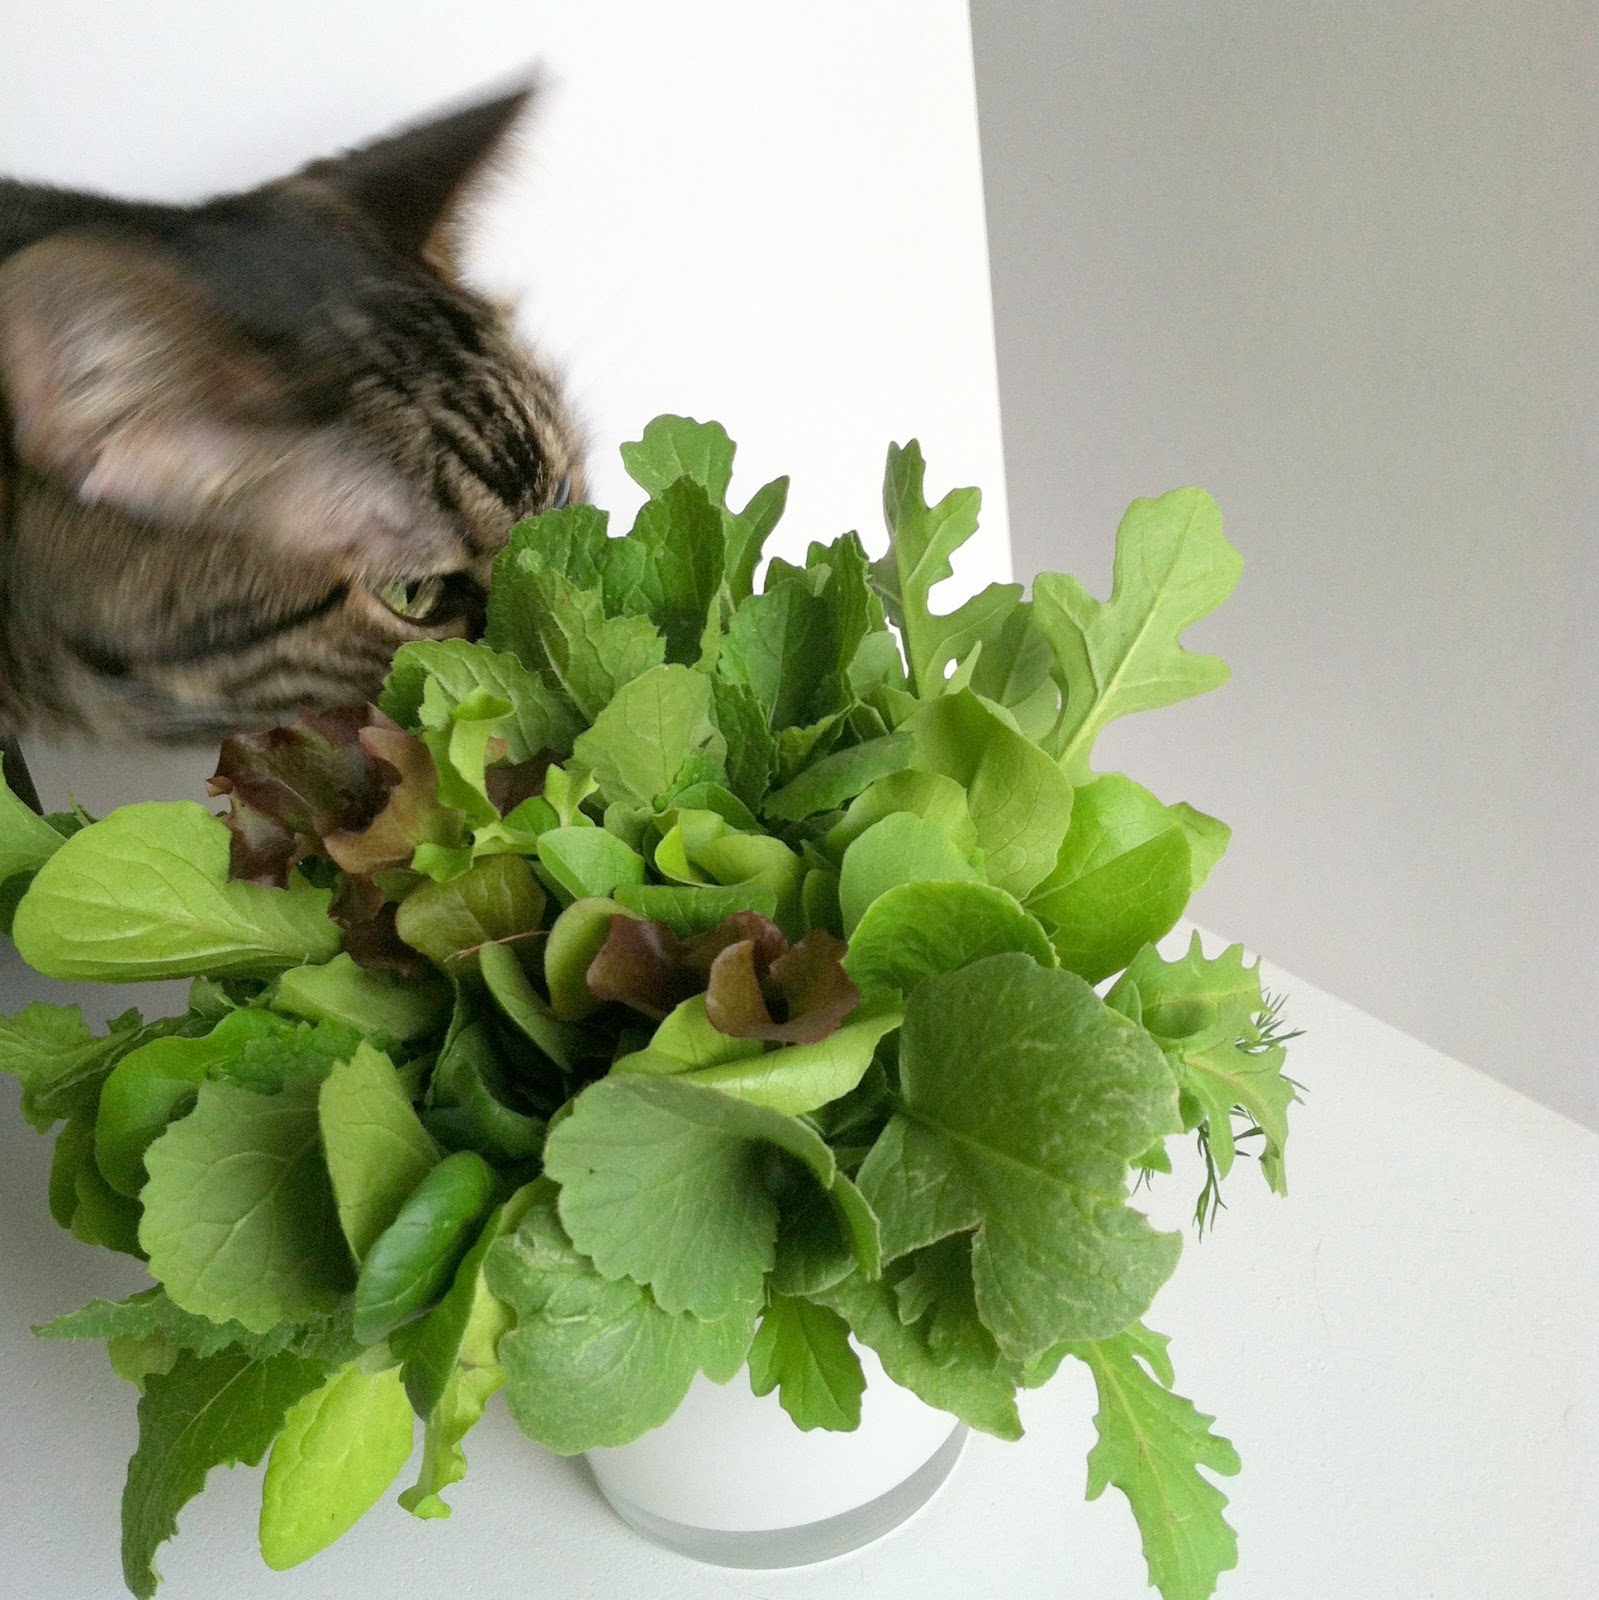
While I have been convalescing inside, the lettuce has been growing, the red mustard is showing its color, and a meadow of dill as popped up.


Everything is loving the arrival of warm weather, so much that it's time to start thinning the rows and debating what is a weed and what is not.  I began picking out the extra plants and gathered a rather large handful that came together like a bouquet.  Above is a mix of heirloom lettuces, green and red mustard, arugula, watercress, bok choy, and dill.  There's a French Breakfast Radish in there, too, but it's striking color is hidden underneath the rest of the bundle.


I didn't take the radish out to take pictures, because, as you can see, I had to work quickly!  Everyone loves a good, green salad.  Even bonafide carnivores.


With my appetite coming back, nourishment is on my mind.  My go-to salad combination is a quick homemade vinaigrette, dried fruit, and nuts.  Cheese would be awesome, but I only wanted blue cheese or chèvre - of which I'm out.

So now I get to eat peacefully on my back patio, enjoying the weather, eating food I grew, reading a novel. Maybe I won't take off to North Carolina after all.


GARDEN SALAD

  • large bowl of mixed greens, including herbs, washed and rinsed
  • a radish or two, sliced thinly
  • dried fruit of choice (here I used apricots)
  • nuts of your choice (walnuts today)
  • olive oil
  • fresh lemon juice or vinegar of choice
  • dijon or other prepared mustard (not the bright yellow American kind)
  • salt and pepper to taste

Add radishes, fruit, and nuts to bowl of greens.

For the dressing, pour a few tablespoons lemon juice or vinegar into a small mason jar.  Add an equal amount of olive oil - since it separates, you don't need to measure, just eyeball it.  Add a spoonful of mustard, cap, and shake.  Season to taste with salt and pepper.  Basically, it's easier than shaking the hell out of a new bottle of store-bought and still getting grease everywhere, so you may as well make it yourself.

Pour dressing on the salad and toss.  Eat outside.


April 25, 2013

Preserved Lemons (Using What I Have II)

I have actually been to the store since the last post about using up ingredients I already have.


But it was cold again and I was feeling particularly lazy after a long work week. I remembered having a discussion with a friend about preserved lemons recently and decided to make some use out of the ones I made a while back.  Although they start out as just lemons and salt, preserved lemons take on an oil-like texture. I like to mix them into salads like tabouleh, to impart their intense saltiness and tartness, but also to give the salad richness.


On the other hand, I'm fresh out of sun-ripened tomatoes and just-picked cucumbers at this time of year, so I came up with a quick salad from, uh, the pantry. I promise it was still good for me.


See?  Chick peas, greens, and tuna.  Easy-peasy and tasted good, too.  I realize that my pantry may have a couple items in it that the average person does not, like pickled cherries. However, preserved lemons are easy to make, requiring just lemons, salt, and time, so I've included the recipe for them along with this salad.  If you're into spending money, you can purchase them at a specialty foods store for something like $8 for two or three lemons.


PRESERVED LEMONS

  • 10 lemons - organic is strongly suggested
  • 1/2 cup sea salt or canning salt (no added iodine)
  • 4 bay leaves
  • 4 cinnamon sticks
  • 1 t. whole black peppercorns
  • sterilized glass quart canning jar, preferably Weck*

Wash half of the lemons in warm water, scrubbing to remove wax. Rinse and dry well, then cut off a thin slice from each end.  Starting at the stem end, quarter each lemon lengthwise just until you reach the other end of the lemon, but do not cut all the way through.  Remove seeds as you come across them, but you don't have to be meticulous.  Juice the remaining five lemons until you get 1 1/2 cups fresh juice.

Measure a tablespoon of salt into the bottom of the jar.  Working over a bowl, stuff each quartered lemon with about a tablespoon of salt.  As you go, pack each one into the jar, open end up.  Once three have been packed, tuck the bay leaves, cinnamon, and peppercorns down the sides. If you're like me, you will attempt to make a pretty arrangement.  Pack the last two lemons and cover them with the remaining salt, including whatever salt and pulp fell into the bowl while working.  Fill the jar with the lemon juice, leaving about 1/2 inch head space.

Place lid on jar and, if using a standard Mason jar, tighten to "fingertip tight." If you don't know what this means, you are new to canning and preserving. Ask me in the comments and I'll explain.

Place the jar in a cool, dark place for two weeks - but somewhere you'll remember to give the jar a daily shake. After two weeks, your lovely preserved lemons are ready, but I'm pretty sure they'll last indefinitely in the fridge. I'm choosing not to admit when I actually made my current batch.

*Weck jars are perfect for this project, because the lids are made of glass and clamp onto the jar with a rubber seal.  The less chance any metal has in coming in contact with the lemons, the better.


SALAD FROM THE PANTRY, WITH PRESERVED LEMONS
  • 1 can chick peas
  • 1 can tuna
  • 1 quarter preserved lemon, pulp removed
  • leftover cooked greens or veg
  • olive oil
  • salt and pepper to taste

Drain and rinse chick peas well in a colander. Toss in a medium bowl with drained tuna and leftover vegetables.  Stir in enough olive oil to lightly coat the ingredients.  Chop preserved lemon finely and mix into salad.  Salt and pepper to taste.  That's it!

About two servings.

You may want to give the empty tuna can to your cat, so that she can push it around with her nose and entertain you while you're eating.

April 18, 2013

Easiest, Quickest Drop Biscuits

Seriously, you can make the batter in less time than it takes to preheat the oven.


Now, I grew up in a small mountain town in Colorado and biscuits were not a common addition to our meals.  But when I am craving a little snack or quick dessert, drop biscuits have become a go-to dish.  They are great warm with butter.  And with jam or apple butter for a sweeter note.


They are not fancy, but they are just what you might want when you start thinking about it.  All warm from the oven, with butter melting into the crumb... so good!  And all in about the time you can brew a cup of tea to go with them.


QUICK DROP BISCUITS
  • 2 cups flour
  • 1 T. baking powder
  • 1/2 t. salt
  • 1/2 cup butter, cold
  • 1 1/4 cup whole milk

Preheat oven to 450 degrees.  Set out two baking sheets, line with parchment paper or foil.

In a medium bowl, whisk flour, powder, and salt together with a pastry blender (or fork).  Cut in cold butter with the pastry blender (or fork), until butter is cut into pieces the size of peas.  Measure out milk, but leave in measuring cup.

Once the oven reaches temperature, stir milk into flour mixture.  Once well combined, scoop large spoonfuls onto the baking sheets.  You can use two spoons for less mess.  Measure out about six on each sheet and bake for 10-14 minutes, until edges start to turn golden.  Let cool slightly and dive right in.  It's that simple.  Really.