Showing posts with label greens. Show all posts

October 21, 2013

The Best Beets

Beets are one of those vegetables that make people think, "Oh, do I have to?"


While I've never disliked beets and have always been in love with their color, I was never really into them until I had this salad.  Beets and walnuts make such a lovely combination!  The tender beets, toasted nuts, and bright vinaigrette may just change beets for you, too.


Growing up, my experience with beets was mostly limited to my mom's "Blender Borscht," a chilled, smooth, and hot pink soup we would have alongside knaidlach.  This is also a very good way to eat beets, but it's not my go-to. The reason is not that I don't like it, because I do, but just that I forget about it.  It does require a blender and since I didn't have one for a long time, the borscht made a permanent home in the back of my mind...kind of like how I ignore recipes that require a microwave. However, I have a blender now and that borscht would make beautiful photos for this blog!

But back to the excellent salad...


BEET SALAD
  • 1# beets, with their greens
  • 1/2 onion, thinly sliced
  • 1/2 cup walnuts
  • 1 T. balsamic vinegar
  • 2 T. apple cider vinegar
  • 3 T. olive oil (or combination with walnut oil, if you have it)
  • 1 t. salt
  • 1/4 cup parsley
  • Fresh baby spinach or mixed greens, for serving
  • Blue cheese, chèvre, or feta, to top

Remove greens and scrub beets well. Place them in a large saucepan with enough water to cover. Wash a few of the greens, chop and set aside.  Bring the beets to a boil and cook for about an hour, until tender.  You can cover the pan if there is enough space between the water level and the top, or keep an eye on the pot and add water as the beets are exposed.

Meanwhile, toast the walnuts over low heat, allow to cool, chop coarsely, and set aside in a large bowl. In a small bowl (or measuring cup), combine vinegars, oil(s), and salt.  Set aside. 

Bring a small saucepan of water to a boil and parboil onions until just translucent, about two or three minutes. Drain in a colander and rinse well with cold water - even the extra-pungent onion I had smelled sweet and fresh and almost floral after parboiling!  Add the well drained onions to the vinaigrette.  While this is not absolutely necessary, I found that in the vinaigrette was a convenient place to keep the onions while waiting for the beets. They also picked up a little extra tartness from the vinegar, which was so nice.

Chop the parsley and add to the bowl with the walnuts, along with the chopped beet greens.

When the beets are fork tender, strain in a colander and run them under cold water.  Peel the beets and chop into large dice.  You could also do slices, but as I have mentioned before, I do not like unwieldy bites of messy foods. Respect your diner (even if that's you)!

Add the beets to the large bowl with the walnuts and greens.  Pour over the vinaigrette and onions and stir to combine well.  Allow to sit for about a half hour, to allow flavors to meld, but you can skip this step if you're hungry and need to get dinner on the table.

Serve over a bed of mixed greens and top with your choice of cheese.  I used blue cheese here, but feta is really great.  The supermarket closest to me only had dry, mediocre feta. Boo.  I love chèvre on pretty much everything. Enjoy your delicious beets!


*Oh, and remember that you had beets later on when you have to pee. (*Sighs with relief.*)

September 2, 2013

Eating Well

Well, maybe.  We humans can't quite figure out this very basic survival instinct, can we?


Having read multiple books and watched documentaries and listened to lectures and so on, it seems that we are very confused what how to eat well.  No matter how much we praise things like flax today, tomorrow it will be deemed over-estrogenic and out out out!  And it is generally well-known these days that low-fat diets lead to weight instability (and inhibit healthy brain function) and that once-vilified butter is way better for you than trans-fatty margarine. It seems to me that keeping it simple is the way to go.

Of course, I'm not the first person to notice this (thank you Michael Pollan, personal idol).


And I mean simple in a variety of ways.  Unless we have diagnosed health problems, our nutrition should not be so complex that we cannot figure it out for ourselves - after learning the basics, of course. It should also not be so strict that we can never indulge.  I call this the Mental Happiness-Body Forgiveness Principle (actually, I don't and just made up that term right now).  If I don't feel like a bad person for enjoying a slice of birthday cake or poorly planning my day's food plan, I will probably feel good and healthy afterwards.

And our food should generally be simple, too.  Limiting pre-packaged and processed foods makes a huge difference, which throws a wrench into the simplicity of planning meals. Now, understand that I make complicated foods at home, like gumdrops and marshmallows.  Each of these require a couple of processed ingredients that I wouldn't suggest eating all of the time, like carageenan gel and boxed pectin, and well, sugar, albeit organic and fair trade.


People tend to make the assumption that I have a sugar addiction, which is not true.  Sure, I enjoy sugary treats, but for me candy works perfectly. If I want something sweet, a couple of pieces of candy quenches the desire and I'm done with it.  I understand that having candy around doesn't work like that for everyone, though.

So why am I offering this diatribe?

I just finished with the main phase of testing my food sensitivities.  And speaking of simplicity, this was an inordinately complex process. Each day started with a large glass of water and liver-support tea before eating anything.  And before coffee.  I also tend to skip breakfast normally, so I had to get on schedule.  Breakfast, lunch, snack, and dinner were all planned and balanced and, thankfully, good.  But I did have to make and pack all of my food, every day.


Water is calculated on individual body weight, daily weather, and activity level.  It's a normal amount of water, but I needed to drink steadily throughout the day and not save it all for the evening like I tend to do.

I also needed to take a probiotics supplement.  I should start by stating that I feel weird about supplements - or anything that is expensive and takes weeks to work, if it does at all, and offers no proof of success. And the whole Butter-Margarine-Butter Problem (also just made that up), in which a wonderful new supplement is considered poison a year later (fish oil, I'm looking at you).  But probiotics are awesome.

Without getting too detailed, taking a program of probiotics does wonders if your systematic yeast is off.  I will try to keep this short, especially if you've seen Gentlemen Broncos and would rather never hear the word "yeast" again. Basically, because I've taken antibiotics a couple of times in the past year, my bacterial balance was thrown off.  I cannot believe how much better I feel after the probiotics.  It worked within two weeks and now I'm done with them until the next time I notice symptoms.


Anyway, I felt great for the duration of this process.  I'm currently taking a three day break to enjoy the holiday weekend and eat some treats, but now I have a common sense plan to go back to.  Here it is:

  • Eat three meals a day, plus a snack and a small dessert.
  • Lunch and dinner should be mostly vegetables, some cooked and some raw.  Don't eat anything raw that doesn't sound appealing raw.  (That's my takeaway, since raw zucchini sounded gross and it was gross and it made me feel gross.)
  • Remember to include protein. Fat, too, but I was already on board with that.
  • Remember to eat fruit (I'm notoriously bad about actually eating fruit).
  • Stop drinking water a few hours before going to bed.
  • Stick to olive oil and butter for cooking fats.
  • Weigh oneself every morning to collect data on weight gain.  This is for checking water retention (read: inflammation), not actual weight.
  • Keep track of other negative responses to food, like upset stomach, increase in seemingly-unrelated health issues, traditional allergic reactions, or skin irritation.
  • Continue to make meals look appealing and attractive and enjoy them.
  • Don't worry about it.

These guidelines allow me to feel well and determine if a new food is something I react to.  Or that something that is commonly reactive is fine for me, like wheat or dairy (YES!).


So here's a balanced meal that makes me feel good.  Hopefully it makes you feel good, too.


A BALANCED VEGETARIAN DINNER
  • olive oil
  • onion, sliced hull-to-hull
  • carrots, diced
  • beet (here I used a candy-stripe or "chioggia" beet), diced
  • zucchini, diced
  • 2-4 shiitake mushrooms, sliced
  • kale, chopped
  • handful of mixed greens per serving
  • apple, diced
  • 2 ounces cheese, diced (I used blue cheese) (optional)
  • 1 ounce goat cheese, per serving (or 2-3 ounces if not using other cheese)
  • balsamic vinegar
  • dried cherries or cranberries, handful per serving (optional)
  • pepitas or sunflower seeds, handful per serving
  • salt and pepper to taste

Heat a tablespoon-ish of olive oil in a large skillet over medium heat.  Add onion and sauté until softened, then add carrots and beets.  Once softened, add zucchini and shiitakes.  Continue to sauté until all vegetables are cooked through and slightly browned on the edges.  Season with salt and pepper, toss, and add kale.  Stir in gently and cook until kale is bright green.  Put about half of this on a plate and top with goat cheese and seeds.

Place mixed greens in a bowl and  top with apple, cheese, and dried fruit.  In a jar, pour in equal amounts balsamic vinegar and olive oil.  Add a pinch of salt, cover, and shake to emulsify and pour over salad.

Depending on  your opinions about combining apples and dried fruit with everything, you may want to stick with just goat cheese and mix half of the cooked veg directly into the salad.  Top with the goat cheese, vinaigrette, and seeds and dig in.

(About 2 servings)


And finally, don't forget to enjoy these last few weeks of summer!

July 29, 2013

Get Out of Town!

This past weekend I hightailed it out of the city for some peace and quiet.  And good food.


After my very city weekend last week, I felt the need for balance by having a follow-up rural weekend. Right after work on Saturday, I packed up and went south to my family home to spend time with my mom and to get away from it all.  No sirens, no street lights, no night clubs, no pollution, no arguments with the landlord, no cell phone reception... no gang fights down the block.  Just the mountains, fresh air, rain, and wholesome food.


I've credited my mother for my appreciation of cooking and food in previous posts.  What I may not have mentioned is that she is practically a self-taught nutritionist. I have learned from her more than I even realize about what we eat. When a friend exclaims to me how great it is that bananas are full of potassium or that flax seeds should be ground or soaked for better absorption in the body, I'm surprised that not everyone already knows these things.  In other words, I am very lucky for my food education I received from my mother.  Once again.


So what did we make for dinner?  Seasonal quiche, of course.  Gluten-free, with any and all fresh garden produce we felt like throwing in.  It's lighter than the traditional kind and wide open to adaptation, so it's one of those dishes that is self-contained like a casserole, but not boring.


This time, we used beautiful forbidden rice and white cheddar for the base/crust.  The turnips were from my garden, sweetened and balanced with carrots.  Swiss chard from someone else's local garden topped out our veg. We garnished with a perfect avocado and a slice from the first Japanese Black Trifele heirloom tomato to ripen on the vine.  We ate on the porch overlooking the mountains, enjoying the petrichor after a day of showers.  We did well for ourselves and we ate our vegetables.  And protein.


HIGH COUNTRY QUICHE
  • 2 cups cooked rice or quinoa (your choice of variety)
  • 4 oz. shredded cheese (cheddar or Monterey Jack are great)
  • 1 T. olive oil
  • 1 clove garlic, minced
  • 1/2 onion, chopped
  • 1-2 cups root vegetables, chopped, like turnips
  • 3 cups greens, trimmed and chopped
  • 3 eggs
  • 1 cup milk
  • salt and pepper
  • avocado, optional

Press rice or quinoa into the bottom of a quiche dish or deep pie plate (grease it first!).  Sprinkle cheese over it evenly and set aside.

Preheat oven to 375 degrees.  Put olive oil and minced garlic in a cold sauté pan and set to medium heat.  When the garlic barely starts to sizzle, add onions and stir a few times.  Add root vegetables and allow to cook for several minutes.  Add salt to season and to draw out some of the moisture.  Do not stir too frequently, in order to get some browning on the vegetables.  When the roots are almost cooked, toss in the greens and cook everything down until you start to see a little caramelization and sticking. This means that enough moisture has cooked out of the vegetables and your quiche won't be waterlogged.

Meanwhile, whisk together eggs and milk.  Add a pinch of salt and few grinds of pepper for good measure.  When the vegetables are cooked, scoop them into the prepared quiche dish and pour over the egg mixture.  Bake for about 45 minutes, until center is set.

Serve with slices of avocado.  And heirloom tomato slices, if you have them.  Next time, switch up your veg, swap out the cheese, and try a different grain.  I love options and renewal...which is the whole theme of a weekend away.


July 1, 2013

Garden Series Part IV: Peas in a Pod

Peas are a given when you have a garden.  But what can we actually do with them when they come into season?


If you're not very careful, they are easy to miss in a mass of tendrils and stalks.  They are very good at hiding and turn from sweet peas into starchy seeds in what seems like a matter of minutes.  When I am harvesting them, it's customary for me to stand there in the garden and eat all the ones I can find before they make the long trek to the kitchen counter.


However, this summer has provided an extended season (believe it or not, this summer has been cooler than the last couple).  My new location for peas seems to be favorable, as well, growing right up the side of a privacy fence.  That, combined with the determination to make something out of the peas, has led to a whole post with an actual recipe.


Okay, okay, so there are not pounds of peas here.  I made a reduced recipe and ate my soup all in one sitting.  But it was the right amount of peas for spending some time on the back patio shelling them and enjoying a cool morning and some peace (no homophone intended).  The soup itself took about fifteen minutes and not too much laboring over a hot stove.


I'm keeping in mind this year to use my favorite cookbook: Tender, by Nigel Slater.  Not only is the book perfect for vegetable gardeners, as it is organized by vegetable, it is beautifully written and worth reading on its own. Slater writes about each vegetable with a sort of honest reverence, without ever tipping the balance to the over-sentimental.  There is also good advice for each vegetable, like which simple ingredients pair well, gardening tips, and the names of many wonderful heirloom varieties.  And he offered me new ways to think about the humble garden pea.


FRESH PEA SOUP
Adapted from "A Green Soup for a Summer's Day;" Tender, by Nigel Slater

  • Large head of lettuce (14 oz.), chopped roughly
  • 1 tablespoon butter
  • 1/4 cup sweet onion, chopped finely
  • 1 lb. peas (after shelling)
  • 1 quart vegetable broth (or water)
  • Handful of herbs
  • Salt and pepper
  • Heavy cream, to garnish
  • Sumac, to garnish

As Nigel warns, wash lettuce thoroughly.  Grit ruins everything when it come to lettuce.

Melt butter over medium heat in a large pot.  Stir in onion, and cook until softened and fragrant.  Add the lettuce and stir until wilted.  Add peas along with broth and herbs and bring to a simmer.  I used lemon balm and thyme, because that's what I have.  Mint is a good idea, but I forgot to grow it this year.

Allow mixture to simmer for about 5-10 minutes, until peas are cooked.  Season with salt and pepper and puree in a blender until very smooth.  Remember to remove the center of the blender lid to allow for heat ventilation - I don't want you to have to clean soup off of the ceiling.

Pour into bowls (3 or 4) and drizzle a tablespoon or so of heavy cream over each serving.  Sprinkle with sumac. While the soup does not need to be chilled, I found that room temperature was nice.  Especially for summer.

Side note: Do NOT underestimate the value of making your own food look nice.  Presentation means a lot when you are dining out, and it can bring some cheer to your home cooked meals, too.  Initially, the sumac was just for prettiness, but it ended up adding the perfect touch of tartness and earthiness to the soup.


June 10, 2013

Garden Series Part II: Arugula & Herbs

Along with salad greens and a few perennial herbs, arugula became one of the biggest hits in the garden in the past couple weeks.  Since it is pungent, and I doubt you need a new recipe for salad, I thought I'd try a pesto.


I found out a wonderful pesto trick last summer when I harvested the last of the basil.  I love pesto, but I do like one that has the right balance of flavors and texture.  I also prefer it to remain bright green and luxurious, but I had accepted that basil oxidizes and pesto only lasts a short time.  But it doesn't have to be that way...


The secret is blanching your herbs.  It sounds like a bad idea; like it would ruin the flavor and wilt the herbs into disintegration.  What it actually does it preserve the flavor and the wonderful green color, adds a silkiness to the finished sauce, and allows it to keep well for days.  This is the type of pesto I will make from now on and freeze at the end of the season to enjoy all year.


In any case, don't skip the blanching and feel free to mix up the choice of herbs.  Basil is always wonderful and quintessential, but consider any soft green herb with bold flavor.  Arugula makes a nice sub for early summer/late spring, when it's growing like crazy and basil is barely sprouting.  Pine nuts can easily be swapped for walnuts, if you're a bit of a traditionalist.


BEST PESTO
  • 4 cups arugula or basil, packed
  • 6 T. parmesan, plus more to garnish
  • 1/4 cup walnuts
  • 1/4 t. garlic powder
  • 1/2 cup olive oil
  • salt to taste

Heat a large pot of water to boiling and set up a bowl of ice water, big enough to hold a strainer.  I like to use my salad spinner for this - after I discovered the strainer part of it can handle hot water.  Once the water comes to a boil, add the arugula and submerge it in the hot water.  Blanch the arugula for just a few seconds - it will become a very bright green.

Pour the arugula through the strainer and replace the strainer in the ice water for a minute, to shock and chill. Remove the strainer from the ice water and allow the water to drain off.

Put the arugula, parmesan, walnuts, and garlic in a food processor.  A chopped clove of raw garlic would be fine here, I just prefer a light touch of garlic flavor so as not to discourage my customers from talking to me for a couple days.  Process the ingredients and allow the blade to run while drizzling in the oil.

Taste the pesto for salt.  Add just a small amount, because the pungency of the herbs and the parmesan have already done some great seasoning work for you.

Enjoy on bread, over pasta, or by the spoonful.  This does keep well, but it might not last long enough to worry about that.


P.S.  I know, I know.  I promised an extra post last week.  It's ready for this Thursday.  I promise.  It's auto-scheduled and everything!

May 27, 2013

Sunday Dinner

I didn't grow up with Sunday dinners - but I was lucky enough to have a homemade family dinner most every evening.  Very lucky, and I believe this fostered my love for food and cooking.


I found out only a couple of years ago that my mother, who taught me how to cook, grew tired of cooking a long time ago.  I have also come to realize that learning how to cook from one's mother was dying tradition even by the time I was a child.  I value having received the education, and more so before my mother was over the whole thing.


Because normally I am cooking for just myself, I have the option to put together something quickly or make something as elaborate as I choose.  I think that for families, today's world would make it nearly impossible to have family dinner every night.  I wonder if the specialness of Sunday dinners will survive a little longer than the daily grind...

I think that I am increasingly enchanted with the idea of Sunday dinners.  It makes an allowance for a time-consuming, special meal that I can share with loved ones or enjoy in solitude.  It's a chance to impress or to remind - oneself as well as others.  It's like having recital, but takes the pressure off the rest of week by requiring no dress rehearsals.


After a few weeks of eating simply, I decided to make ravioli.  From scratch.  The day was beautiful and my back patio is now in its season.  The garden is brand new, but it's coming along quickly.  (Actually, this photo is from eight days ago and the garden already looks completely different.  Yep, that's compost in the corner.)  Photo courtesy of my dinner guest.


HOMEMADE RAVS, FOR SUNDAYS
  • 1/2 recipe fresh lasagne noodles, or fresh pasta dough if you have a pasta machine
  • 1 bunch kale or other greens, stemmed, thinly sliced
  • 1 pint ricotta cheese
  • 2 eggs
  • olive oil
  • 1/2 t. salt, plus more for pasta water
  • a few grinds black pepper
  • 1/2 recipe tomato-butter sauce
  • parmesan, for serving


Cut the lasagne noodles into square(ish) pieces or roll out your fresh pasta dough and do the same.  If you go with the store-bought fresh lasagne noodles and made the sauce in advance, this could actually be a weeknight meal.

Steam kale and set in strainer in sink to drain well.  Place the ricotta in a medium bowl and crack in both eggs.  Stir to combine well and season with salt and pepper.  Give the drained kale another once over with a knife and stir into ricotta mixture.  Set a large, well-salted pot of water to boil.

Put a spoonful of ricotta mixture in the center of each pasta square. Bring opposite corners together over the filling to create a triangle and press to seal.  If the pasta just doesn't stick to itself, use a little water as a binder.

Once water is boiling, add the ravioli and boil about 5-6 minutes.  When they are done, they will float to the top and have an al dente texture and appearance.  Don't worry, you'll know it when you see it.  Use a "spider" (or large, wide slotted spoon) to gently fish the cooked ravioli out of the water.  Set aside onto a towel-line platter to soak up some of the cooking water.  Serve with a ladle of tomato sauce over each ravioli and a sprinkling of parmesan cheese.

Serves 4, or 2 with lunch leftovers.

P.S.  Happy Memorial Day!  I don't know how to grill, so you get pasta instead.

May 20, 2013

First, Salad

The garden has shown a rather remarkable renewal in the past week.


While I have been convalescing inside, the lettuce has been growing, the red mustard is showing its color, and a meadow of dill as popped up.


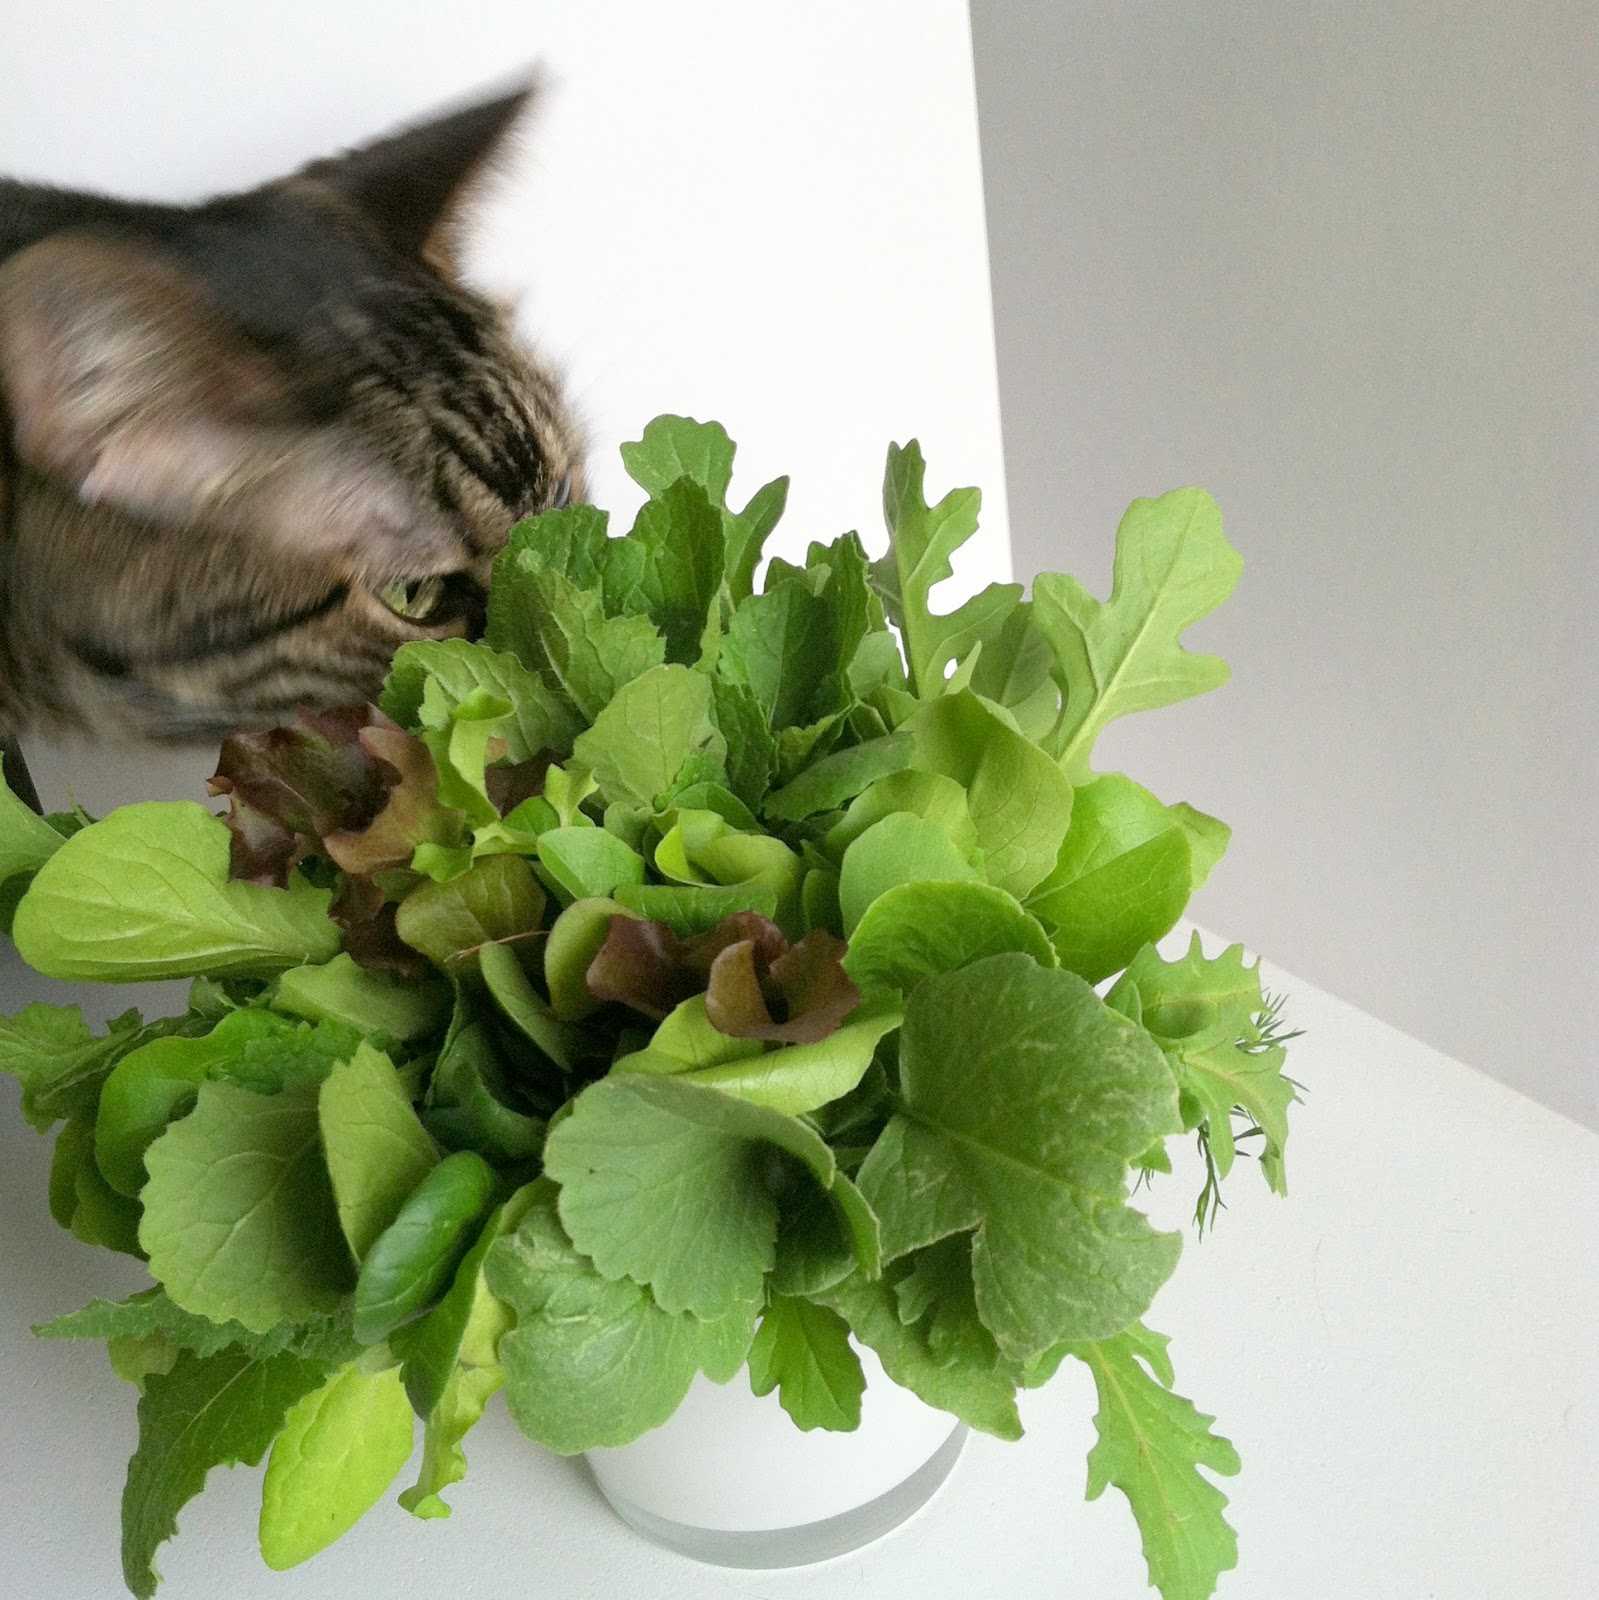
Everything is loving the arrival of warm weather, so much that it's time to start thinning the rows and debating what is a weed and what is not.  I began picking out the extra plants and gathered a rather large handful that came together like a bouquet.  Above is a mix of heirloom lettuces, green and red mustard, arugula, watercress, bok choy, and dill.  There's a French Breakfast Radish in there, too, but it's striking color is hidden underneath the rest of the bundle.


I didn't take the radish out to take pictures, because, as you can see, I had to work quickly!  Everyone loves a good, green salad.  Even bonafide carnivores.


With my appetite coming back, nourishment is on my mind.  My go-to salad combination is a quick homemade vinaigrette, dried fruit, and nuts.  Cheese would be awesome, but I only wanted blue cheese or chèvre - of which I'm out.

So now I get to eat peacefully on my back patio, enjoying the weather, eating food I grew, reading a novel. Maybe I won't take off to North Carolina after all.


GARDEN SALAD

  • large bowl of mixed greens, including herbs, washed and rinsed
  • a radish or two, sliced thinly
  • dried fruit of choice (here I used apricots)
  • nuts of your choice (walnuts today)
  • olive oil
  • fresh lemon juice or vinegar of choice
  • dijon or other prepared mustard (not the bright yellow American kind)
  • salt and pepper to taste

Add radishes, fruit, and nuts to bowl of greens.

For the dressing, pour a few tablespoons lemon juice or vinegar into a small mason jar.  Add an equal amount of olive oil - since it separates, you don't need to measure, just eyeball it.  Add a spoonful of mustard, cap, and shake.  Season to taste with salt and pepper.  Basically, it's easier than shaking the hell out of a new bottle of store-bought and still getting grease everywhere, so you may as well make it yourself.

Pour dressing on the salad and toss.  Eat outside.


April 25, 2013

Preserved Lemons (Using What I Have II)

I have actually been to the store since the last post about using up ingredients I already have.


But it was cold again and I was feeling particularly lazy after a long work week. I remembered having a discussion with a friend about preserved lemons recently and decided to make some use out of the ones I made a while back.  Although they start out as just lemons and salt, preserved lemons take on an oil-like texture. I like to mix them into salads like tabouleh, to impart their intense saltiness and tartness, but also to give the salad richness.


On the other hand, I'm fresh out of sun-ripened tomatoes and just-picked cucumbers at this time of year, so I came up with a quick salad from, uh, the pantry. I promise it was still good for me.


See?  Chick peas, greens, and tuna.  Easy-peasy and tasted good, too.  I realize that my pantry may have a couple items in it that the average person does not, like pickled cherries. However, preserved lemons are easy to make, requiring just lemons, salt, and time, so I've included the recipe for them along with this salad.  If you're into spending money, you can purchase them at a specialty foods store for something like $8 for two or three lemons.


PRESERVED LEMONS

  • 10 lemons - organic is strongly suggested
  • 1/2 cup sea salt or canning salt (no added iodine)
  • 4 bay leaves
  • 4 cinnamon sticks
  • 1 t. whole black peppercorns
  • sterilized glass quart canning jar, preferably Weck*

Wash half of the lemons in warm water, scrubbing to remove wax. Rinse and dry well, then cut off a thin slice from each end.  Starting at the stem end, quarter each lemon lengthwise just until you reach the other end of the lemon, but do not cut all the way through.  Remove seeds as you come across them, but you don't have to be meticulous.  Juice the remaining five lemons until you get 1 1/2 cups fresh juice.

Measure a tablespoon of salt into the bottom of the jar.  Working over a bowl, stuff each quartered lemon with about a tablespoon of salt.  As you go, pack each one into the jar, open end up.  Once three have been packed, tuck the bay leaves, cinnamon, and peppercorns down the sides. If you're like me, you will attempt to make a pretty arrangement.  Pack the last two lemons and cover them with the remaining salt, including whatever salt and pulp fell into the bowl while working.  Fill the jar with the lemon juice, leaving about 1/2 inch head space.

Place lid on jar and, if using a standard Mason jar, tighten to "fingertip tight." If you don't know what this means, you are new to canning and preserving. Ask me in the comments and I'll explain.

Place the jar in a cool, dark place for two weeks - but somewhere you'll remember to give the jar a daily shake. After two weeks, your lovely preserved lemons are ready, but I'm pretty sure they'll last indefinitely in the fridge. I'm choosing not to admit when I actually made my current batch.

*Weck jars are perfect for this project, because the lids are made of glass and clamp onto the jar with a rubber seal.  The less chance any metal has in coming in contact with the lemons, the better.


SALAD FROM THE PANTRY, WITH PRESERVED LEMONS
  • 1 can chick peas
  • 1 can tuna
  • 1 quarter preserved lemon, pulp removed
  • leftover cooked greens or veg
  • olive oil
  • salt and pepper to taste

Drain and rinse chick peas well in a colander. Toss in a medium bowl with drained tuna and leftover vegetables.  Stir in enough olive oil to lightly coat the ingredients.  Chop preserved lemon finely and mix into salad.  Salt and pepper to taste.  That's it!

About two servings.

You may want to give the empty tuna can to your cat, so that she can push it around with her nose and entertain you while you're eating.

April 22, 2013

Hollandaise Magic

I am not much of a breakfast fan, but brunch... brunch is perfect.


When I go out for brunch, I usually opt for savory dishes.  Any menu item with hollandaise sauce gets priority at ordering time. Think about hollandaise for a minute.  It's buttery, creamy, and if I get my preference, quite lemony.  And while the traditional Eggs Benedict is a great choice, if that's the only way you have had hollandaise, you might not know how great it is with greens.


Yesterday, I was unable to decide whether I wanted to make brunch or go out.  I just could not make the decision, but I had known that I required hollandaise sauce either way.  As I was working and chatting with coworkers and trying to make up my mind about brunch, I eventually realized that I had planned an entire homemade brunch menu.  Love it when my subconscious helps me out like that.

I hadn't made hollandaise sauce in a while and I felt up to the challenge.  Turns out that it's no challenge at all - especially when you use a "cheater" blender recipe that isn't really cheating at all!  The only things that are missing from the process is a lot of whisking and a sore arm.  The result is brilliant - in flavor, texture, and ease.

If you wish to try out my very own version of Eggs Benedict, hmmm... let's call it the Cole Benedict... swap the English Muffins for home fries, the Canadian bacon for sautéed greens (kale always seems to be on sale), and poached eggs for fried eggs.  Serve with a side of (good ol' American) bacon and with plate of fresh fruit.  The strawberries we had yesterday were the best in months! Drain off and save the bacon fat (for something like maple-bacon caramels) and use what's left in the pan for the eggs.

And the hollandaise-greens combo is seriously a perfect pairing. If you just sauté some greens and top it with hollandaise sauce, you have a very good plan.  And maybe just a little bit of magic.


CHEATER'S HOLLANDAISE
(adapted from Eric Ripert's Blender Hollandaise)

  • 10 T. butter
  • 1 egg yolk
  • 1 medium lemon
  • pinch salt

Melt butter over medium low heat in a small saucepan.  Swirl to melt thoroughly.  You may skim off the milk solids if you are so inclined, but it's not necessary.

If your kitchen is cold and the egg yolk is straight from the fridge, you may want to pre-warm the blender pitcher with hot water.  Dump water and dry pitcher.  Blend together egg yolk and the juice of one half lemon.  With the blender running, remove the center of the lid and slowly pour in the melted butter in a thin stream.

Once combined, taste sauce.  It will probably be very thick and I will always want more lemon.  Add a pinch of salt and lemon juice to taste.  Blend again and taste to adjust salt.  Pour all over everything on your plate.

This recipe will serve four well, but will generously serve three.  As a rule, hollandaise does not keep well, but yesterday's third serving is miraculously still in the fridge intact.  Don't use any metal ever when working with lemon juice and eggs.